Agenda – Day 7
NFS (Linux to Linux File Sharing)
CIFS (Linux to Windows File Sharing)
Chrony (Time Server Configuration)
Cron (Job Scheduling)
Performance Monitoring
Troubleshooting
File Sharing Using NFS (Network File System)

What is NFS?
NFS allows Linux systems to share directories over a network.
🗄 NFS Server → Central storage
💻 NFS Client → Access shared storage
📂 Shared Folder → Exported directory
NFS Server Configuration
# yum install nfs-utils -y
# mkdir /shared_folder
# vi /etc/exports
Add:
/shared_folder 192.168.1.0/24(rw,sync,no_subtree_check)
Restart:
# systemctl enable nfs-server
# systemctl restart nfs-server
NFS Client Configuration
# yum install nfs-utils -y
# showmount -e <server_ip>
# mount -t nfs server_ip:/shared_folder /mnt
Permanent:
# echo "server_ip:/shared_folder /mnt nfs defaults 0 0" >> /etc/fstab
Mounting Windows Shares Using CIFS

CIFS allows Linux to mount Windows shared folders.
CIFS Configuration
# yum install cifs-utils -y
# vi /root/.smbcredentials
Add:
username=Administrator
password=Pass@1234
domain=dorole.org
Secure:
# chmod 600 /root/.smbcredentials
Mount:
# mount -t cifs -o credentials=/root/.smbcredentials //win01/win-share /mnt
Permanent entry in /etc/fstab:
# //win01/win-share /mnt cifs credentials=/root/.smbcredentials 0 0
Chrony – Time Server Configuration

Time synchronization is critical for:
✔ Logs
✔ Database consistency
✔ Clusters
✔ Authentication
Modern Linux uses chronyd service.
Chrony Master (NTP Server)
# yum install chrony -y
# vi /etc/chrony.conf
Add:
allow 192.168.2.0/24
server 0.pool.ntp.org iburst
server 1.pool.ntp.org iburst
Start:
# systemctl enable chronyd
# systemctl restart chronyd
Allow firewall:
# firewall-cmd --permanent --add-service=ntp
# firewall-cmd --reload
Verify:
# chronyc sources
# chronyc tracking
Chrony Client
Edit:
# vi /etc/chrony.conf
Add:
server 192.168.1.100 iburst
Restart:
# systemctl restart chronyd
Check:
# chronyc tracking
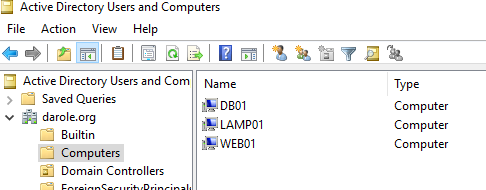
Integrating a Linux Server with Active Directory
Prerequisites:
- A Linux server with root access (e.g.,
lamp01). - An existing Active Directory domain (e.g.,
darole.org). - AD administrative credentials (e.g.,
vallabh@darole.org).
1. Configure DNS for AD Domain ResolutionEnsure the Linux server can resolve the AD domain by editing /etc/resolv.conf:
# cat /etc/resolv.conf
search darole.org
nameserver 172.16.1.200
nameserver 192.168.2.1
options timeout:2
Verify the DNS SRV records for LDAP and Kerberos:
# dig +short SRV _ldap._tcp.darole.org# dig +short SRV _kerberos._tcp.darole.org# dig +short SRV _kerberos._udp.darole.org
2. Install Required Packages
Install the necessary tools for AD integration:
# yum install adcli realmd sssd oddjob oddjob-mkhomedir samba-common-tools krb5-workstation authselect-compat openldap-clients
3. Configure Kerberos
Edit /etc/krb5.conf for Kerberos authentication:
cat /etc/krb5.conf
includedir /etc/krb5.conf.d/
[logging]
default = FILE:/var/log/krb5libs.log
kdc = FILE:/var/log/krb5kdc.log
admin_server = FILE:/var/log/kadmind.log
[libdefaults]
dns_lookup_realm = true
dns_lookup_kdc = true
ticket_lifetime = 24h
renew_lifetime = 7d
forwardable = true
rdns = false
pkinit_anchors = FILE:/etc/pki/tls/certs/ca-bundle.crt
spake_preauth_groups = edwards25519
default_realm = DAROLE.ORG
default_ccache_name = KEYRING:persistent:%{uid}
udp_preference_limit = 0
[realms]
DAROLE.ORG = {
kdc = 172.16.1.200
admin_server = 172.16.1.200
}
Test Kerberos authentication:
# kinit vallabh@DAROLE.ORG
# klist
4. Verify LDAP ConnectivityUse ldapsearch to query the AD domain:
# ldapsearch -H ldap://172.16.1.200 -D "vallabh@darole.org" -W -b "dc=darole,dc=org"
5. Join the Linux Server to AD Domain
Join the AD domain using the realm command:
# realm join -v darole.org -U vallabh
Verify the AD integration:
# id -a vallabh@darole.org
6. Test SSH Login Using AD Credentials
From a remote machine:
ssh lamp01 -l vallabh@darole.org
Conclusion
The Linux server is now successfully integrated into the AD domain. Users can log in with their AD credentials and access resources as authorized.
Cron/AT – Job Scheduling in Linux
AT: Used to execute a command ONE TIME at a specified time.
CRON: Used to execute commands REPEATEDLY according to a schedule.
AT:
- Used for one-time tasks.
- Command runs only once.
- Uses the atd service.
- Check jobs using: atq
- Delete a job using: atrm
CRON:
- Used for recurring tasks.
- Command runs repeatedly.
- Uses the crond service.
- Check jobs using: crontab -l
- Edit jobs using: crontab -e
The "at" command is used when you want to execute a command
ONE TIME in the future.
Run a command at 10:00 PM.
[root@rocky ~]# at 10:00 PM
Enter the command:
[root@rocky ~]# systemctl restart httpd
Press:
Ctrl+D
The job will be scheduled and executed once at 10:00 PM.
To run a command after 10 minutes:
[root@rocky ~]# at now + 10 minutes
Then enter:
[root@rocky ~]# touch /tmp/testfile
Press:
Ctrl+D
The command will execute once after 10 minutes.
Use "atq" to display scheduled at jobs.
[root@rocky ~]# atq
Example output:
5 Wed Sep 23 22:00:00 2026 a root
Here:
5 = Job ID
Wed Sep 23 22:00:00 2026 = Scheduled time
a = Queue
root = User
If the job ID is 5:
[root@rocky ~]# atrm 5
The scheduled job will be removed.
The "at" command uses the atd service.
Check the service:
[root@rocky ~]# systemctl status atd
Start the service:
[root@rocky ~]# systemctl start atd
Enable the service at boot:
[root@rocky ~]# systemctl enable atd
Cron is used to execute commands or scripts repeatedly
according to a predefined schedule.
Edit the current user's cron jobs:
[root@rocky ~]# crontab -e
View cron jobs:
[root@rocky ~]# crontab -l
Cron uses five fields:
* * * * * command
| | | | |
| | | | └── Day of Week (0-7)
| | | └──── Month
| | └────── Day of Month
| └──────── Hour
└────────── MinuteRun backup every day at 10:00 PM:
[root@rocky ~]# crontab -e
Add:
0 22 * * * /root/backup.sh
Meaning:
0 = Minute
22 = Hour
* = Every day of month
* = Every month
* = Every day of week
Therefore:
/root/backup.sh
will run every day at 10:00 PM.
Run a command every 5 minutes:
*/5 * * * * df -h >> /var/log/disk_usage.log
Meaning:
*/5 = Every 5 minutes
Run a script every hour:
0 * * * * /root/test.sh
Run a script every Sunday at 2:00 AM:
0 2 * * 0 /root/cleanup.sh
Run a script at 6:30 AM from Monday to Friday:
30 6 * * 1-5 /root/report.sh
Cron uses the crond service.
Check the service:
[root@rocky ~]# systemctl status crond
Start the service:
[root@rocky ~]# systemctl start crond
Enable the service at boot:
[root@rocky ~]# systemctl enable crond
AT
Purpose : One-time task
Command : at
Service : atd
View jobs : atq
Delete job : atrm JOB_ID
CRON
Purpose : Repeated task
Command : crontab
Service : crond
View jobs : crontab -l
Edit jobs : crontab -e
Performance Monitoring in Linux
Monitoring performance helps detect system bottlenecks.
📊 Important Commands
top
# top
vmstat
# vmstat 2
iostat
# iostat -x 2
sar
# sar -u 1 5
netstat
# netstat -tulnp
mpstat
# mpstat -P ALL 1
free
# free -h
Troubleshooting in Linux
🔥 Common Issues
High CPU
Use:
top
mpstat
Disk Full
df -h
du -sh *
Reset Root Password
Edit GRUB
Add
rd.breakUse
passwd
Recover Deleted LVM
vgcfgrestore
Clear RAM Cache
sync; echo 3 > /proc/sys/vm/drop_caches
DNS Issues
Check
/etc/resolv.confUse
nslookupUse
dig
7️⃣ Increasing CPU & Memory in Virtual Environments
In production, sometimes performance issues are resolved by scaling resources.
🖥 Increase CPU & RAM in VMware vCenter
Steps:
Login to vCenter
Right-click Virtual Machine
Click Edit Settings
Increase:
Number of CPUs
Memory (RAM)
Click OK
Login to vCenter
Right-click Virtual Machine
Click Edit Settings
Increase:
Number of CPUs
Memory (RAM)
Click OK
If VM is running:
Ensure CPU Hot Add and Memory Hot Add are enabled
Otherwise power off VM before increasing resources
After increasing:
Inside Linux verify:
nproc
free -h
lscpu
☁ Increase CPU & RAM in Microsoft Azure
Used in cloud environments.
Steps:
Login to Azure Portal
Go to Virtual Machines
Select your VM
Click Size
Choose larger VM size
Click Resize
Login to Azure Portal
Go to Virtual Machines
Select your VM
Click Size
Choose larger VM size
Click Resize
⚠ Sometimes VM must be stopped before resizing.
After resizing:
Verify inside Linux:
lscpu
free -h
🎯 Updated Key Takeaways – Day 7
✔ NFS – Linux-to-Linux sharing
✔ CIFS – Linux-to-Windows integration
✔ Chrony – Time synchronization
✔ Cron – Automation
✔ Performance monitoring tools
✔ Root password recovery
✔ LVM troubleshooting
✔ Resource scaling in VMware & Azure